Using the clinic picker and clinic links
With the Locations add-on enabled, the storefront clinic picker makes sure every order belongs to a clinic. Here’s how it works for customers — and every way to hand out clinic-specific links.
How the picker works for customers
It’s automatic — no setup needed:
- First visit: a popup asks the customer to choose their state, then their clinic.
- No clinic, no cart: customers can browse without choosing (dismissing keeps the popup quiet for the rest of their visit), but it reopens if they try to add anything to the cart — so every order always has a clinic.
- Remembered: once chosen, the clinic is saved for a year, and for logged-in customers the choice follows their account across devices.
Optional: add a “Find a clinic” link to your site
Paste this snippet — called a shortcode — into any page, post, or widget, wherever you’d normally type text:
[qualiphy_clinic_picker]
When the page is viewed, WordPress replaces that text with a small clinic widget. Visitors who haven’t chosen a clinic yet see a “Find a clinic” link that opens the picker; visitors who have see their current clinic with a “Change” link.
It’s a convenience for customers who want to see or switch their clinic — the automatic popup works whether or not you add it. You’ll find the snippet ready to copy on the Qualiphy → Locations page, and before any locations are added it simply shows nothing.
Clinic links
Share a link like yourstore.com/?clinic=12 and anyone who opens it is automatically set to that clinic. It works on any page of your store — including product pages — so it’s ideal for clinics promoting the store to their own patients, or for ads that should credit a specific location.
Where clinics find their links
Each clinic has ready-made, click-to-copy links in its own dashboard under My Account → Clinic tab (visible to any user assigned to that clinic):
- The “Share This Clinic” card holds the clinic’s storefront link.
- The product link picker below it builds a direct link to any product with the clinic already attached — for products with multiple options, each option gets its own link that opens with that option pre-selected.
For store admins: building a link yourself
You don’t need to log in as clinic staff to get a clinic’s ID:
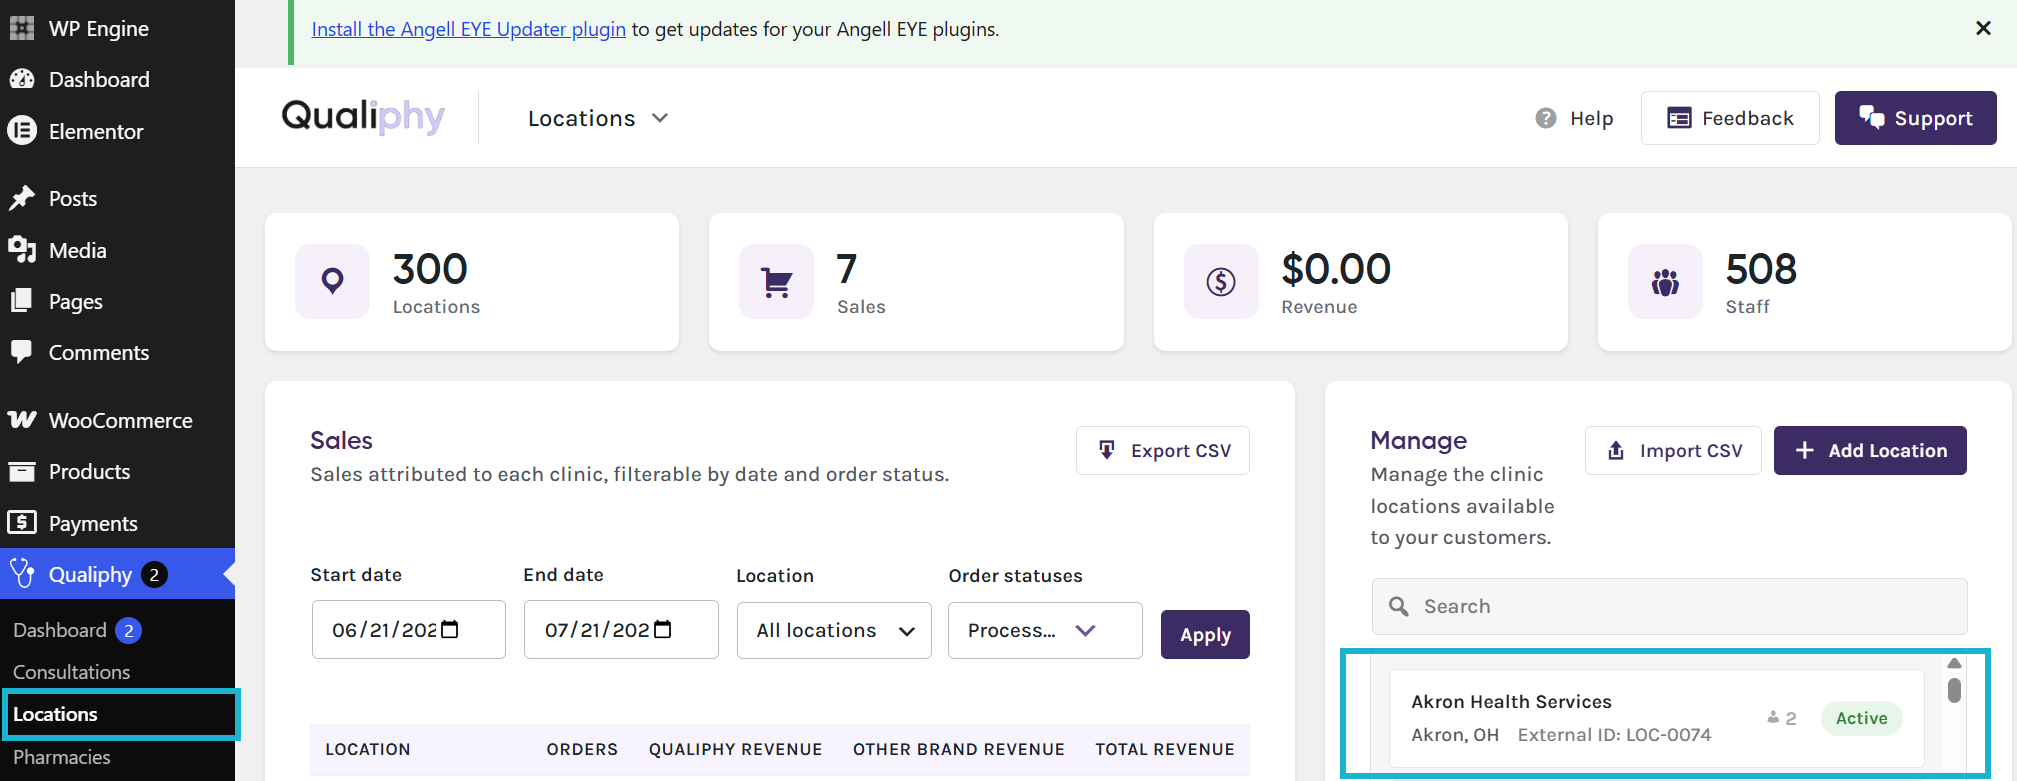
- In WordPress, go to Qualiphy → Locations.
- In the Manage section, click the location you want a link for.
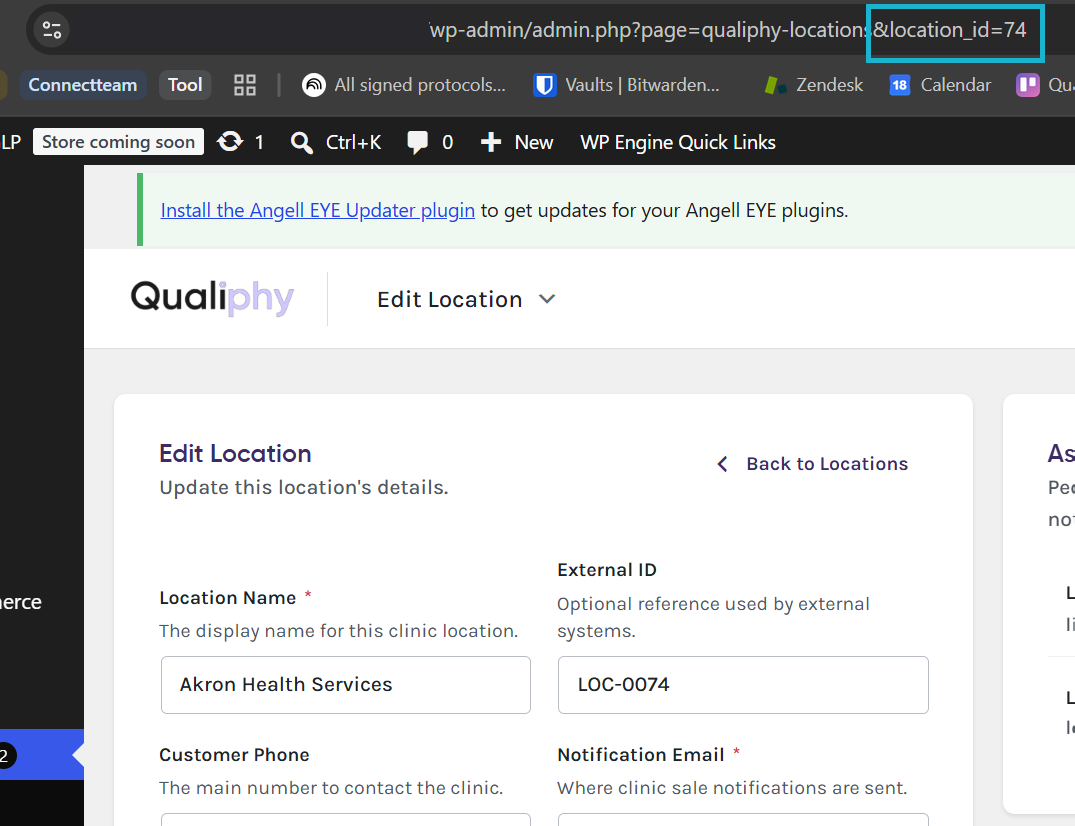
- Look at your browser’s address bar — the URL ends with
location_id=followed by a number. That number is the clinic’s ID. - Use that number as the
clinicvalue in the link. If the address bar showslocation_id=74, the clinic’s link isyourstore.com/?clinic=74.
A future plugin update will surface each location’s ready-made link right in the admin, so this address-bar step won’t be needed — until then, it works on every version with the Locations add-on.
One thing to watch: the External ID field on the location (e.g. LOC-0074) is a separate reference for outside systems and doesn’t work in links — only the number from the address bar does.
Still stuck? We're quick to respond.
Email [email protected]. Available 7 days a week, 7 AM to 6 PM PT.